If you’ve cracked or damaged the screen on your iPhone 6s, consider trying to fix it yourself rather than paying for a professional repair. While DIY repairs can be a cost-effective option, it’s essential to be aware that they can also be risky. You could cause further damage to your device if you don’t follow the correct procedures. With that in mind, here are some instructions and links to iFixit guides to help you fix your iPhone 6s screen safely and effectively:
Step 1: Gather your tools and materials. Before you start your repair, you’ll need to gather the following tools and materials:
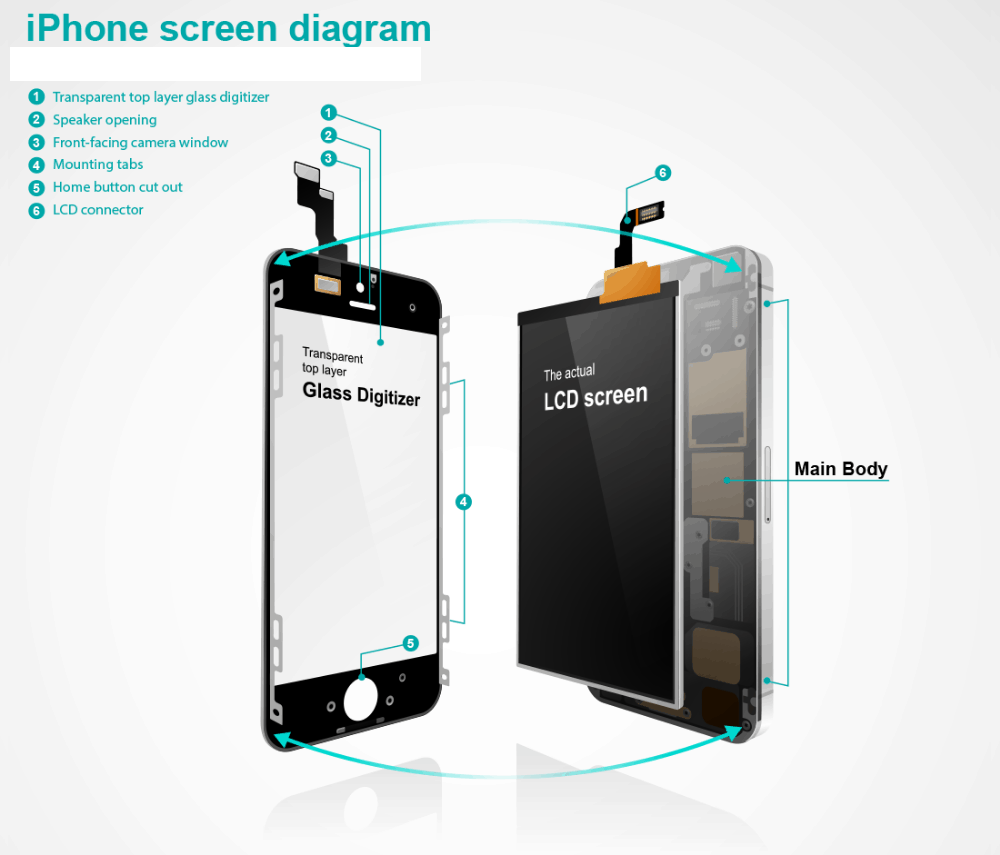
- A new iPhone 6s screen replacement kit
- A set of small, precise screwdrivers (Phillips and Pentalobe)
- A heat gun or hairdryer
- A plastic pry tool or a guitar pick
- A suction cup or a vacuum cleaner
Step 2: Power off your iPhone and remove the SIM card tray. To begin your repair, you’ll need to power off your iPhone and remove the SIM card tray. To do this, you’ll need to use your Pentalobe screwdriver to loosen the two screws on the bottom of the phone, then use the suction cup or vacuum cleaner to lift the screen from the body of the phone gently. Once the screen is loose, you should be able to remove the SIM card tray by inserting your SIM card eject tool or a paperclip into the hole on the side of the phone.
Step 3: Remove the screen. Next, remove the sim card tray. Next, you’ll need to use your heat gun or hairdryer to gently heat the edges of the screen for about a minute. The screen adhesive will soften, making it easier to remove the screen. Once the adhesive is softened, you’ll need to use your suction cup to gently lift the screen from the phone’s body. Finally, you may need to use your plastic pry tool or guitar pick to pry the screen away from the phone’s body gently. Be careful not to apply too much force or damage the screen.
Step 4: Disconnect the screen. Once the screen is lifted, you’ll need to disconnect it from the motherboard. To do this, you’ll need to use your Phillips screwdriver to remove the four screws that hold the screen in place. Once the screws are removed, you’ll be able to gently lift the screen away from the motherboard, careful not to damage any of the connectors.
Step 5: Install the new screen. Once the old screen is removed, you’ll be ready to install the new screen. To do this, you’ll need to follow the instructions provided in your screen replacement kit. This will generally involve connecting the new screen to the motherboard, securing it with the screws, and reassembling the phone. You’ll want to be extra careful when reassembling the phone to ensure that all the connectors are properly aligned and that the screen is seated correctly.
Step 6: Test the new screen. Once you’ve reassembled the phone, you’ll need to power it on and test the new screen to ensure it’s working properly. If the screen is functioning correctly, you’re all set! If you’re having issues, check that all the connectors are correctly seated and that the screen is properly installed.
If you need clarification on any part of the repair process or help following the instructions in your screen replacement kit, consider using an iFixit guide. iFixit is a helpful resource for DIY repair enthusiasts. Several detailed guides are available for various iPhone models, including the iPhone 6s. You can find the iFixit guide for repairing the iPhone 6s screen here: https://www.ifixit.com/Guide/iPhone+6s+Screen+Replacement/58623
In conclusion, repairing the screen on your iPhone 6s can be a cost-effective way to fix a damaged or broken screen. While the process can be intimidating for those new to DIY repairs, you should be able to fix your screen safely and effectively with the right tools and instructions. Just follow the instructions carefully and take your time, and you’ll be back to using your iPhone in no time!